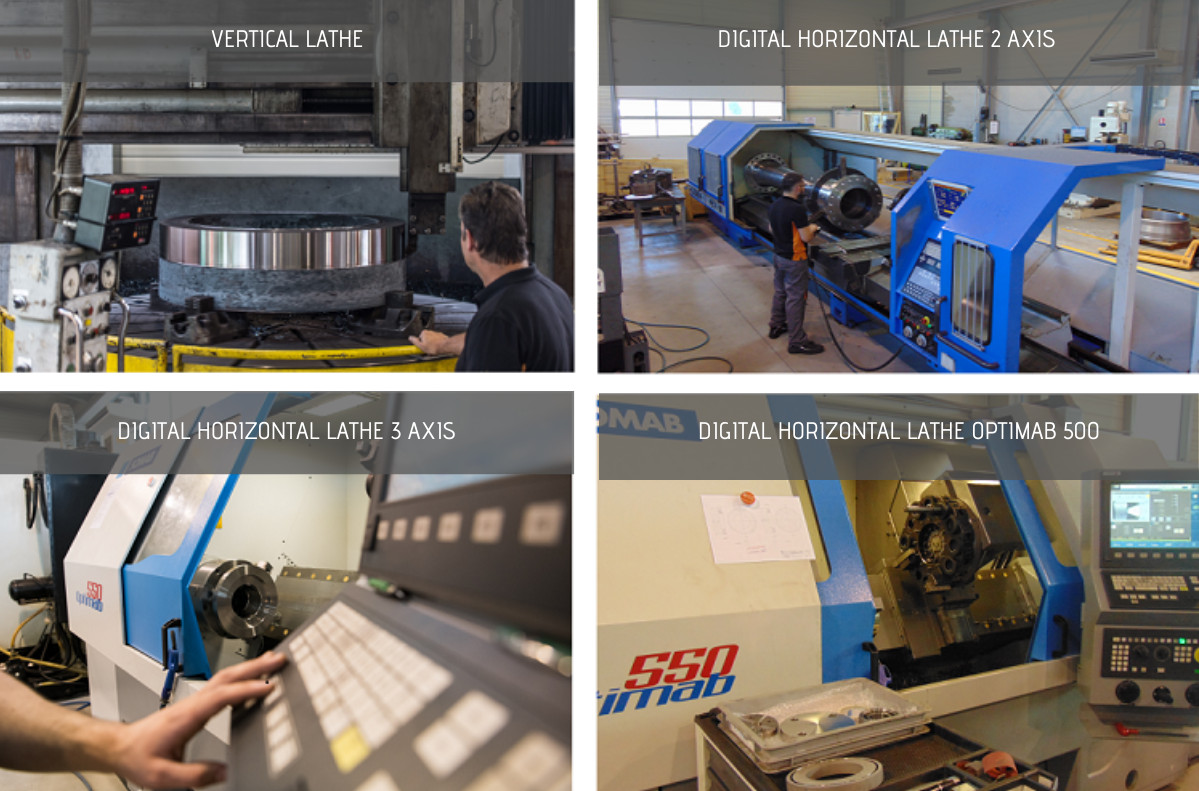
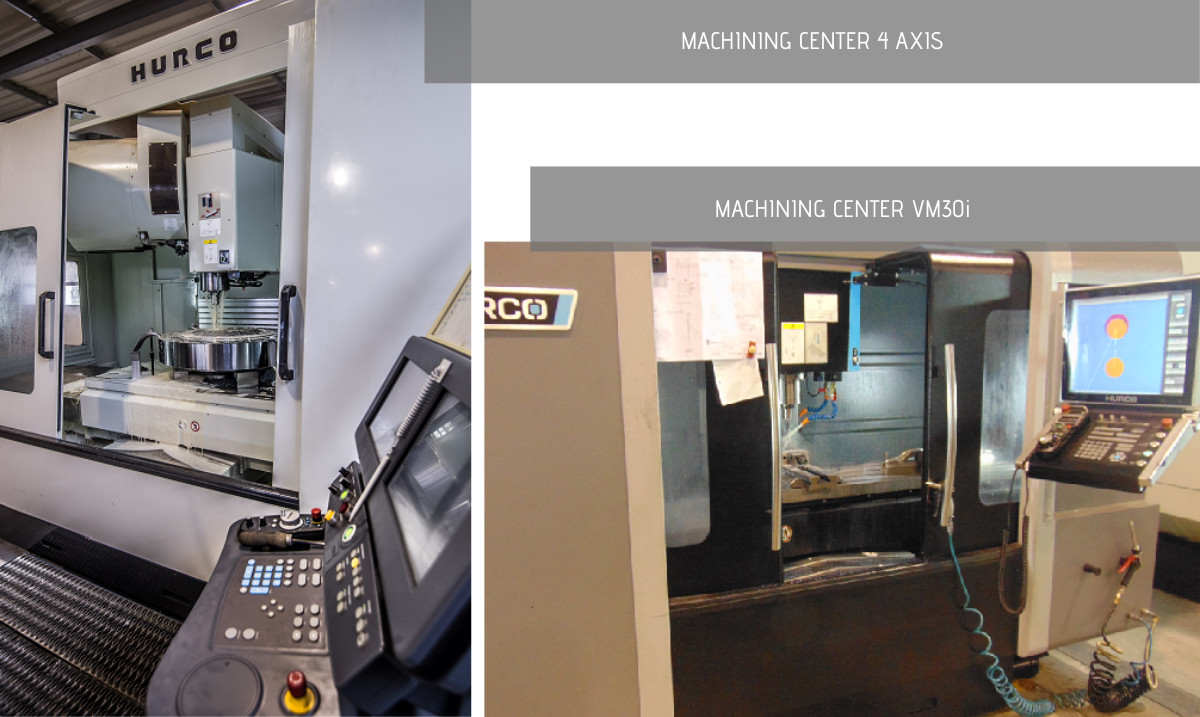
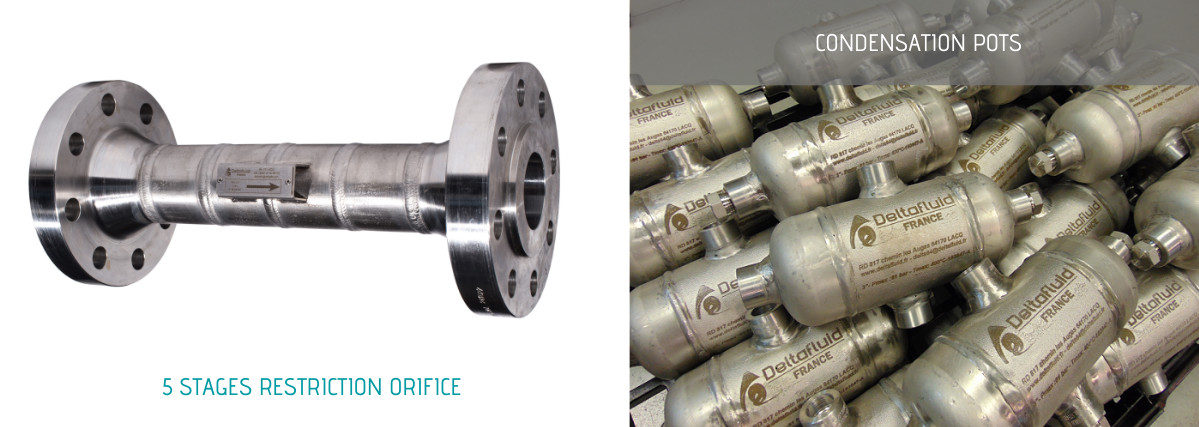
Mechanical manufacturing, machining, welded parts
Our know-how for over 50 years allows us to manufacture tailor-made mechanical units both in machining and in welded assemblies. We offer manufacturing of :
➮ single units of small to large series
➮ prototypes, complex parts or special tooling parts
➮ with all types of materials : carbon steel, stainless steel, duplex, super-duplex, alloy (hastelloy, inconel, cupro-nickel...), soft iron, bronze, aluminium, titanium, tantalum, ceramic, plastic, fiberglass... (see more material grades at the bottom of the page)
These business skills develop our capacity to meet the needs of Oil & Gas, Chemical & Petrochemical, Energy & Nuclear, Iron & Steel, Aerospace... industries.
Our capabilities in turning, milling, drilling, deep drilling and marking are detailed here:
TURNING
- 3 SOMAB UNIMAB 500 digital lathes, max Ø 500 mm, 1500 mm between centers
- 1 SOMAB UNIMAB 450 digital lathe, max Ø 450 mm, 1200 mm between centers
- 1 SOMAB UNIMAB 500 digital lathe, 12 tools turret, max Ø 500 mm, 1500 mm between centers
- 1 CAZENEUVE HC 900 digital lathe, max Ø 1000 mm, 1500 mm between centers
- 1 CAZENEUVE HCBN 900 digital lathe, max Ø 900 mm, 5000 mm between centers
- 1 MORI SEIKI SL 250 BMC / 1000 lathe with milling axis C
- 1 SOMAB OPTIMAB 550 lathe, with milling axis C, max Ø 550 mm, 1500 mm between centers
- 1 ERNAULT SOMUA TS3 lathe, semi-automatic
- 2 ERNAULT SOMUA CHOLET 435 lathes, max Ø 435 mm, 1200 mm between centers
- 2 ERNAULT SOMUA CHOLET 550 lathes, max Ø 550 mm, 1000 and 1500 mm between centers
- 1 RAMO lathe, max Ø 300 mm, 1200 mm between centers
- 1 ERNAULT SOMUA Jupiter 830 lathe, max Ø 830 mm, 1500 mm between centers
- 1 MORANDO vertical lathe, max Ø 2700 mm, height 1500 mm
MILLING & MACHINING CENTER
- 1 HURCO VMX64 machining center + 4th axis, X 1600 * Y 800 * Z 800
- 1 HURCO VM30i machining center, X 1000 * Y 500 * Z 500
- 1 HURCO VMX40 machining center, X 1000 * Y 500 * Z 500
- 1 SACHMAN digital milling machine, X 1800 * Y 800 * Z 800
- 1 HURON MU6 milling machine, X 1600 * Y 600 * Z 600
- 1 SERRMAC TCSE milling machine, X 1600 * Y 250 * Z 500
DRILLING
- 1 drilling rig SIG B16.5, Ø 3 to 30 mm, length 500 mm
- 1 drill press RF40
- 1 radial drill SYDERIC SR45
Welding and welded assemblies
We are welding according to the European standard according to EN ISO 15614-1 or ASME IX.
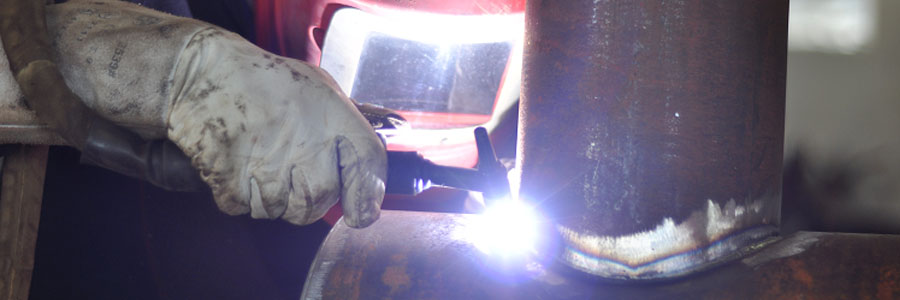
The processes used are:
- MIG / MAG # 135 or 136 (GMAW)
- TIG # 141 (GTAW)
- SAEE # 111 (SMAW)
We are able to weld the following basic materials:
- carbon steel: group 1 according to ISO / TR 15608 - P1 according to ASME IX
- stainless steel: group 8.1 according to ISO / TR 15608 - P8 according to ASME IX
- duplex: group 10.1 / 10.2 according to ISO / TR 15608 - P10H according to ASME IX
- low alloy steel: group 5.1 according to ISO / TR 15608 - P4 according to ASME IX
- high temperature steel: group 1.2 according to ISO / TR 15608 - P3 according to ASME IX
Some examples of mechanically welded assemblies made by Deltafluid :
Welding notebook
For a welded assembly, all the documents requested for the welding book are provided to the customer in accordance with the requirements of the code used:
- Drawing with weld locations and descriptions
- QMOS (Qualification du Mode Opératoire de Soudure) according to NF EN ISO 15614-1 or PQR (Procedure Qualification Record) according to ASME IX: includes all welding data used to weld a qualification assembly and the results of the corresponding mechanical tests for each process used welding
- DMOS (Descriptif du Mode Opératoire de soudure) according to NF EN ISO 15609-1 or WPS (Welding Procedure Specification) according to ASME IX: each assembly configuration and corresponding welding process are precisely described and provide instructions for the realization of welds
- QS (Qualification Soudeur) according to EN ISO 9606-1 or WPQ (Welders Performance Qualification) according to ASME IX: the qualification of the welder must correspond to the variables given for each welding process used and each type of weld.
Dimensional control
At the end of the manufacturing process, all our parts are systematically checked visually and dimensionally according to the validated drawing.
Our control devices are checked periodically by a metrology laboratory.
We have the following control tools: calipers, depth gauges, internal micrometers, external micrometers, rings, smooth buffers, threaded buffers.
In addition, the specific tools allow us a thorough control:
- MITUTOYO measuring column,
- MAHR roughness tester,
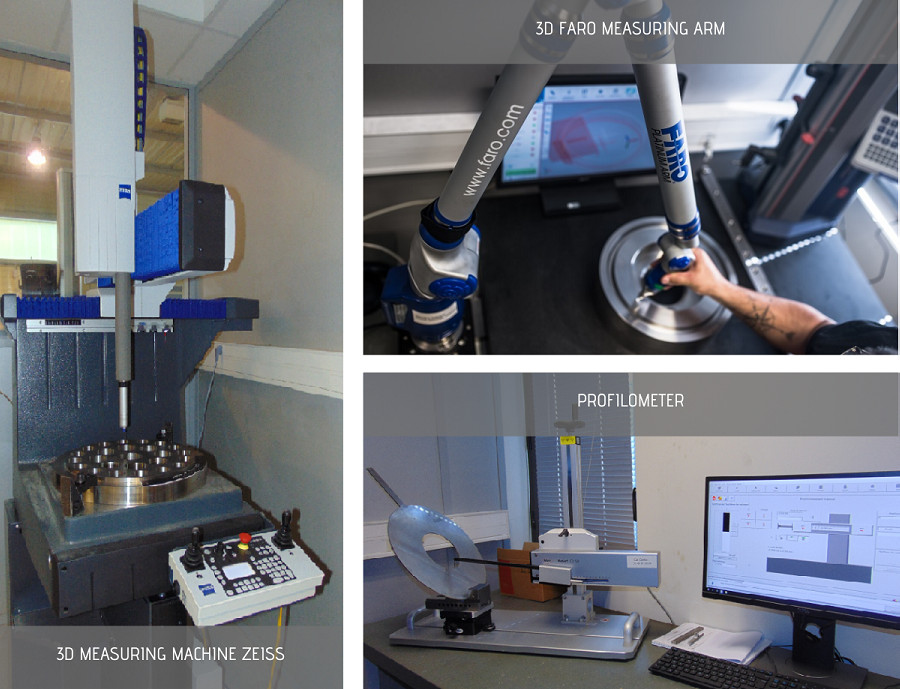
- three-dimensional FARO measuring arm (max. Ø 2200 mm),
- MAHR MarSurf CD120 profilometer,
- three-dimensional measuring machine ZEISS DuraMax X 500 * Y 500 * Z 500.
The Zeiss machine allows the control of small parts. The profilometer makes it possible to measure the sharp edge edges of the flowmeters.
For more details on the dimensional control, you can find here general tolerances values :
- for machining according to ISO 2768 standard
- for welded constructions according to ISO 13920
Non destructive testing
The main control techniques that we propose are:
- Visual Control (or Visual Testing - VT)
- Penetrant Testing (PT)
- Radiography (or Radiographic Testing - RT)
- Ultrasonic Testing (or Ultrasonic Testing - UT)
- Leak tightness testing (LT)
- PMI / Ferrite rate
- Hydraulic test flowmeters.
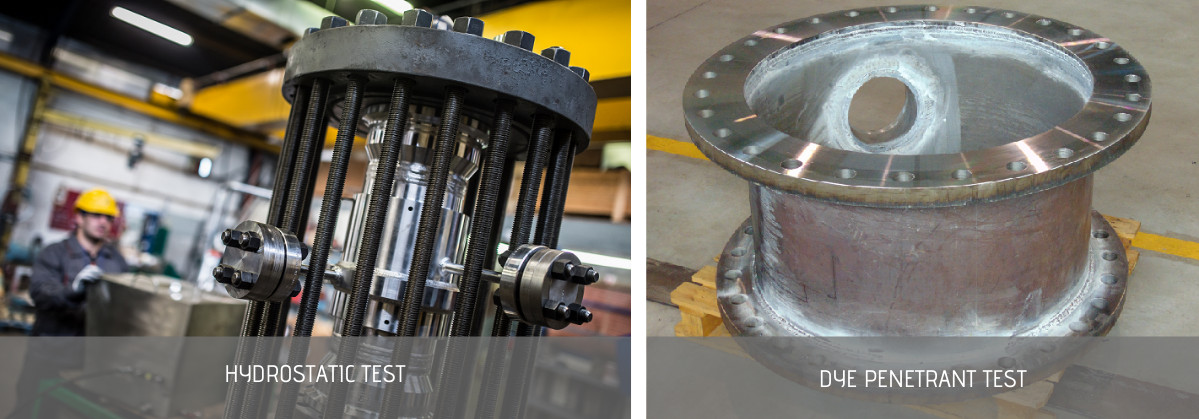
Non destructive tests called NDT (applied to forged, rolled, molded and welded parts) highlight all the defects likely to alter the availability, the safety of use and / or more generally the conformity of a part for the purpose for which it is intended.
Two types of defects are sought:
-
surface defects such as cracks, holes, cracks, bites ...…
- internal defects such as porosities, blisters, inclusions, non-emergent cracks, thickness variations due to wear or corrosion ...
➮ Complementary controls also make it possible to check the chemical nature of the materials used (PMI) and the mechanical resistance of the parts (hydraulic test).
➮ For more details on NDT, you can find here a table with methods used and type of defects which can be highlighted.
Special attention for your specific needs
If some of these controls are imposed by construction codes or regulatory requirements, we are also able to take into account the specific requirements of our customers.
We have for this:
- Review procedures validated by Cofrend Level 3 certified personnel according to EN ISO 9712 or ASNT-TC-1A Level 3
- Cofrend Level 2 certified examiners according to EN ISO 9712 or ASNT -TC-1A Level 2
- Key construction codes specifying the applicable examination methods and acceptance criteria (ASME V, ASME VIII, ASME B31.1, ASME B31.3, CODAP / CODETI, NF EN 13480 / NF EN 13445, RCC-M, RCC-MRx, etc.)
Calibration & Products Inspection
For special applications, we are also able to offer a calibration of our devices in an approved laboratory (COFRAC, ISO 17025 ...).
All inspection and testing steps as well as manufacturing steps can also be inspected by the customer or an independent third party.
Material & Traceability
We are able to provide certificates of control of our raw materials adressing the NF EN 10204 standard. There are several types classified here from the least to the most demanding:
- Type 2.1 Certificate of compliance with the order
- Type 2.2 Check statement
- Type 3.1 Acceptance certificate 3.1
- Type 3.2 Acceptance Certificate 3.2
Deltafluid has complementary skills to provide you with products with the desired finish:
- Degreasing (clean and dry cleaning, for cryogenic application or for O2 service)
- Pickling / Passivating
- Ultrasonic cleaning
- Shot blasting / Sandblasting
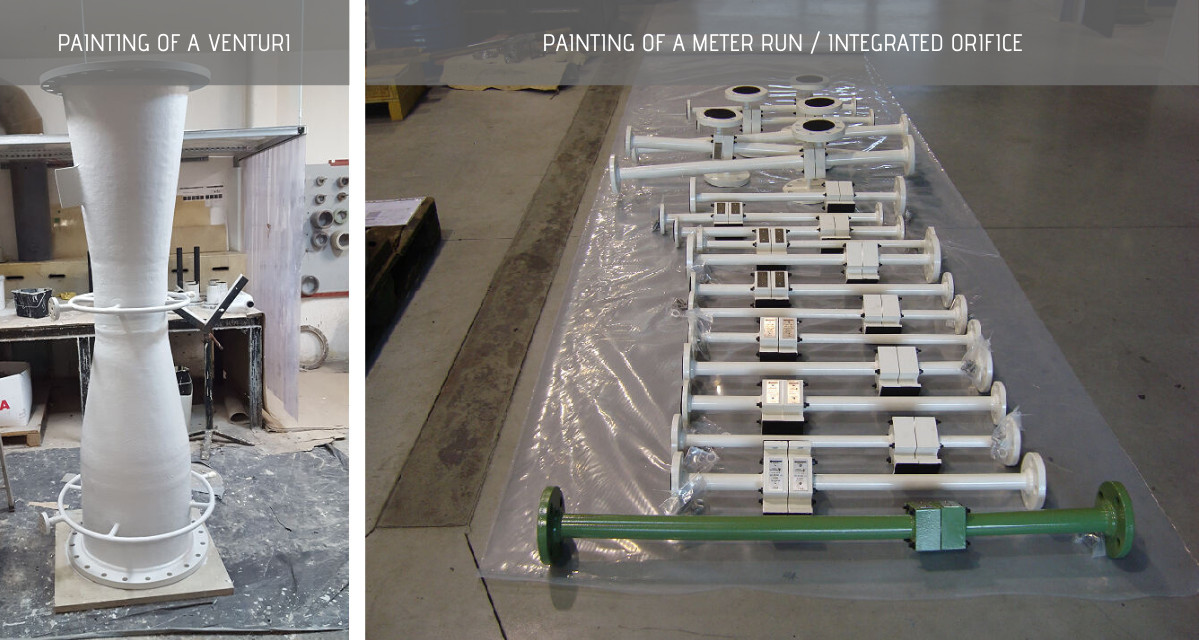
- Painting
- Polishing
- Protection / Coating (Stellite, PTFE, Inconel, ... for surfaces in contact with aggressive fluids)
Pickling - Passivating :
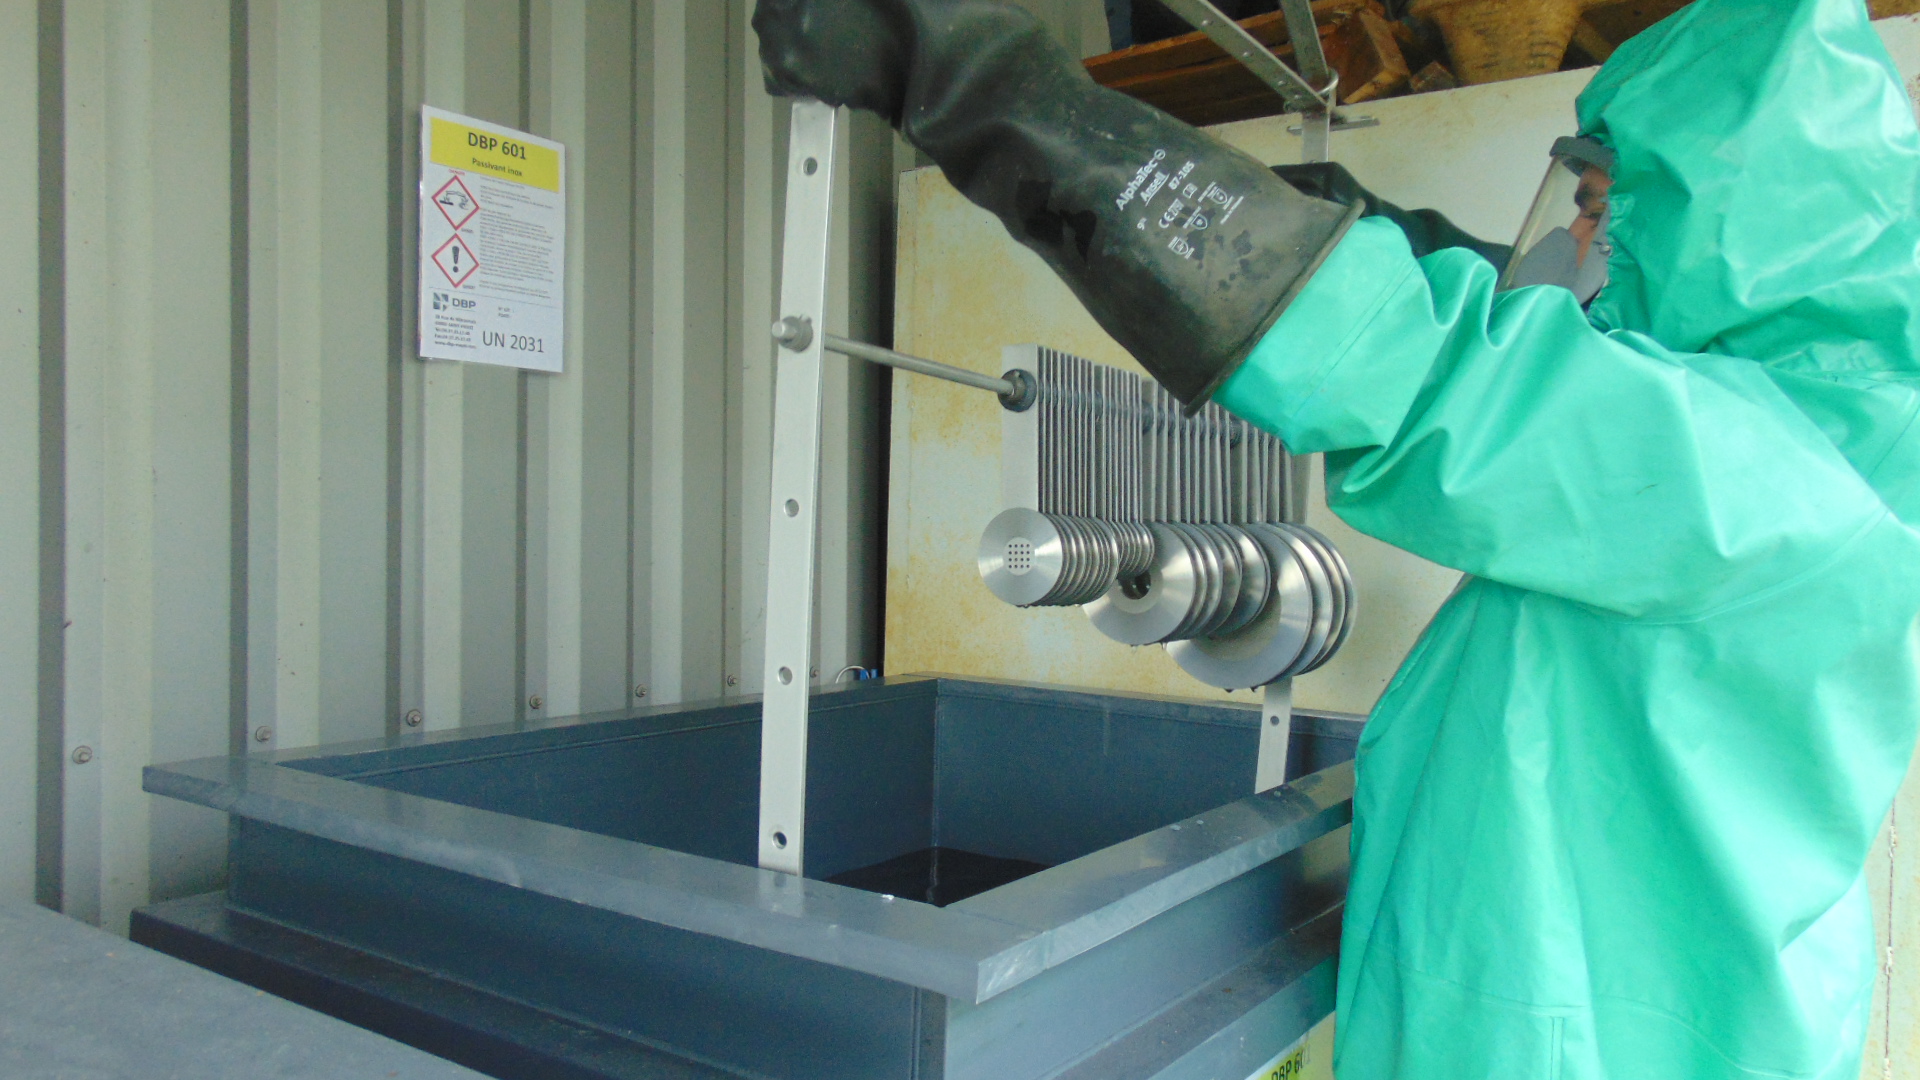
The thin film of chromium oxide present over the entire surface of stainless steel, which allows it to resist corrosion, can be damage as a result of welding or machining operations. Pickling is used to completely remove oxides and expose stainless steel. The passivation process is then carried out to recreate a protective layer of a sufficient and homogeneous thickness which provides protection against corrosion.
Protection - Coating :
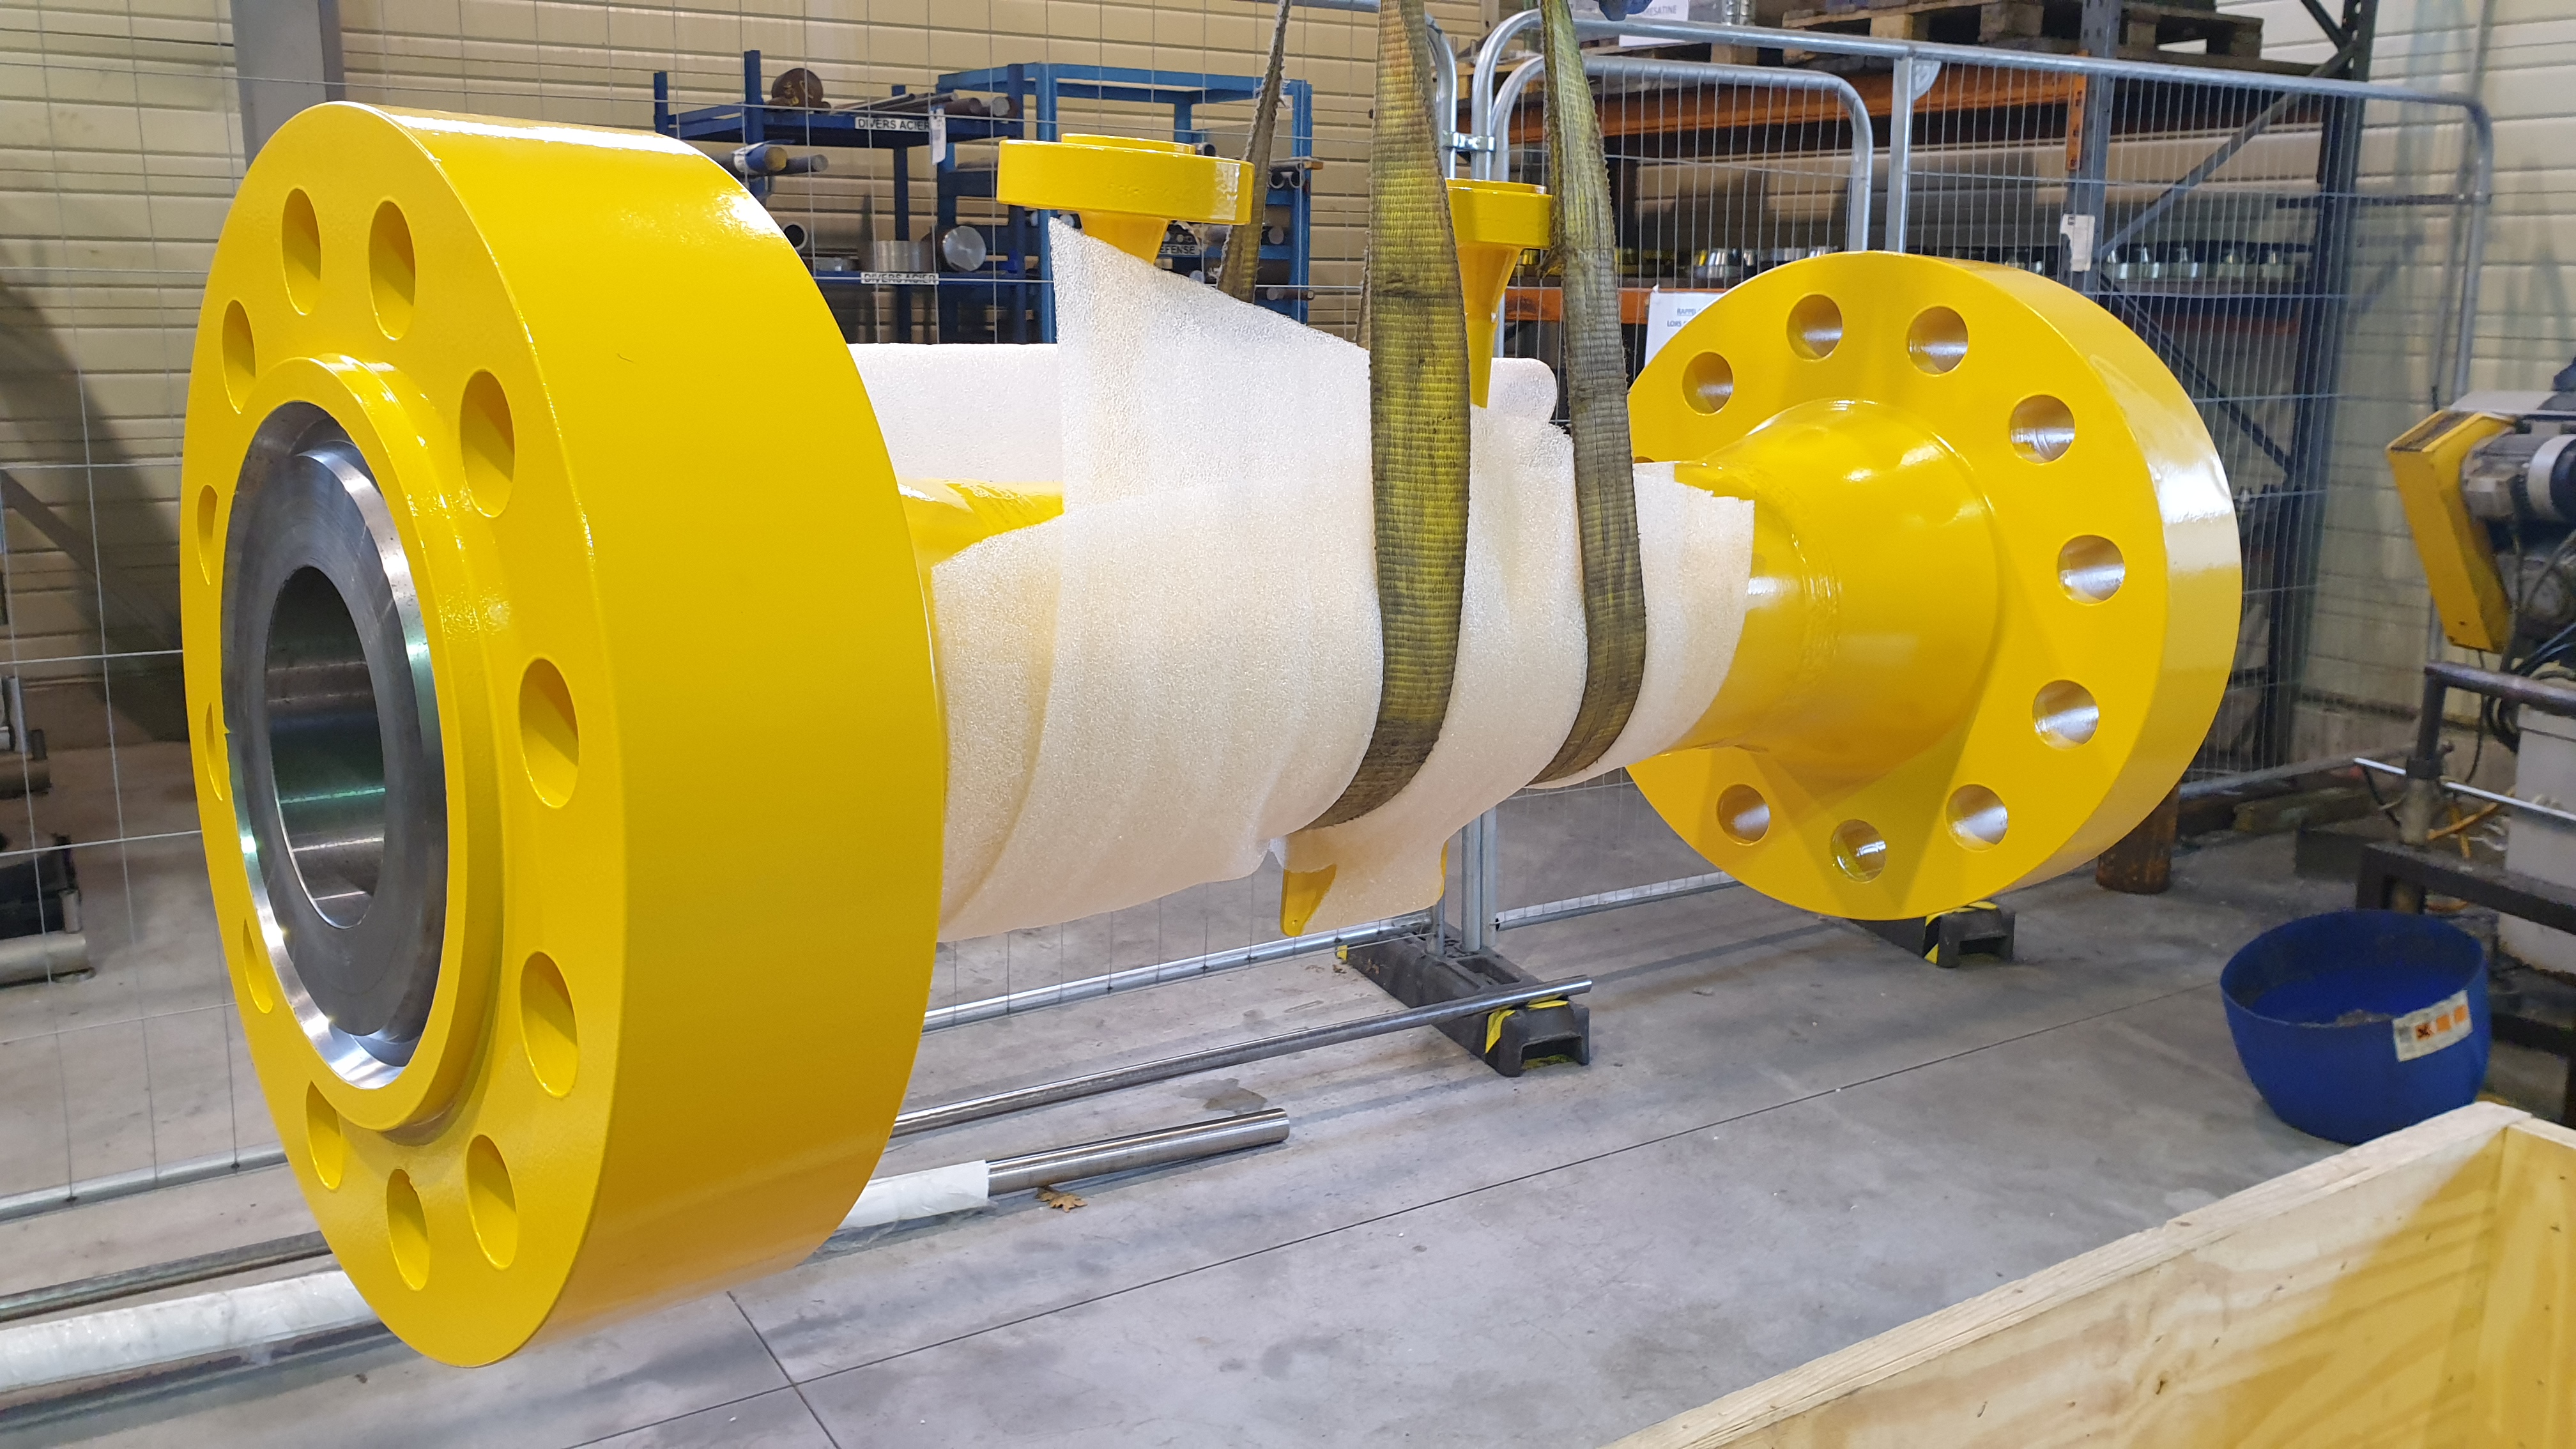
Depending on customer specifications, parts can be painted or coated with a special coating to withstand local climatic conditions and all risks of external aggression.
The ACQPA, Association for the Certification and Qualification of Anticorrosion Painting, certifies anticorrosion painting systems intended for the protection of metal structures corresponding to the "high durability" class of standard NF EN ISO 12944-1.
The certification aims :
-
Corrosion protection of paint systems applied to metal structures,
-
The stability of appearance and color with respect to UV radiation (for parts of structures exposed to natural light).
The certification class corresponds to the ability of the paint system to withstand the environment to which it is exposed according to standard NF EN ISO 12944-2 : for an atmospheric environment, from a very low corrosivity classified C1 to a very high corrosivity in an industrial environment C5I or in a marine environment C5M.
For structures falling within the C5M corrosivity category with parts subjected to the combined effect of the atmosphere and seawater (eg offshore), the C5Mm classification applies.
The choice of the paint system is therefore made by taking into account the external environment but also the temperature of the fluid as well as the material of the part to be protected. Depending on the system, the topcoat can be tinted (RAL to be defined) to meet customer requirements.
Finally, we are able to call out FROSIO certified examiners to provide advice, monitoring and inspection of the painting systems used.
If you do not find the answer you are looking for, please contact us either by phone at +33 (0)5.59.30.85.20 or via the contact form. We will respond as soon as possible.
316L stainless steel is the most commonly used material for our applications. That's why all our equipment that can be in contact with the fluid is manufactured in standard in 316L stainless steel. However, we offer a wide range of complementary materials tailored to your needs:
carbon steel, low alloyed steel, duplex, super-duplex, hastelloy, monel, inconel, soft iron, bronze, cupro-nickel, aluminum, titanium, plastic, fiberglass ...
This list is not exhaustive, we invite you to consult us for any complementary material.
Yes, we are a subcontractor for some precision mechanical machining companies for whom we provide on-demand inspection services.
In addition to conventional control devices, we are equipped with specific tools that allow us to control a large number of parts: MITUTOYO measuring column, MAHR roughness tester, FARO three-dimensional measuring arm (max Ø 2200 mm), MAHR profilometer MarSurf CD120, three-dimensional ZEISS DuraMax measuring machine (L 500 mm x 500 mm x H 500 mm). We can thus perform precise measurements of pieces of various shapes and profiles and provide you with a detailed inspection report.
We invite you to contact us to establish a detail of the desired services.
We are able to offer machining on digital lathe with capacity 900 mm in diameter over 5 m long, we can also machine parts up to 2700 mm in diameter on conventional vertical lathe.
Yes, we are able to grind off tubes.
On vertical lathe, maximum tube length 1000 mm, maximum diameter 2000 mm.
On horizontal lathe, with steady mounting, maximum length 4000 mm, maximum diameter 600 mm (24 '').
Requirements / applications special
Depending on your application, we can supply materials that meet the requirements of very specific standards:
-
NACE MR 0175 / ISO 15156 standard for materials used in environments with a high concentration of hydrogen sulfide H2S (including oil & gas)
-
NACE MR 0103 / ISO 17945 standard for materials used in the petroleum, natural gas or petrochemical industries for stress cracking in a corrosive environment
Deltafluid can also supply a material :
-
qualified by TÜV, Lloyd's Register, ABS, BV, DNV, CCS, NORSOK.
-
whose mechanical properties have been verified by tensile tests (ambient or high temperature), resilience tests (specific temperature) or US control of the material.
Material grade
Here is a non-exhautive list of the materials used for the manufacturing of our elements (american denomination for round, tube or sheet metal or european denomination or usual name - more details here) :
- stainless steels & duplex : 304, 304L, 316, 316L, 309, 310, 316Ti, 321, 904 / Uranus B6, Duplex F51 / Uranus 2205, Super-duplex F53 / Uranus 2507, Duplex F60 / Uranus 2205
- carbon steels : A516 Gr70, P355, P295, P265, A106 GrB, A350 LF2, F44, F52,...
- alloy steels : A182 F1 / 16Mo3, A182 F11 / 13CrMo4-5, A182 F12 / 13CrMo4-5, A182 F91, 6Mo,...
- nickel base alloy : Inconel® 600, inconel® 400, inconel® 625, inconel® 800, inconel® 825, inconel® 718, hastelloy® C22, hastelloy® C276, monel® 400, cupro-nickel 90/10 C07 600,...
- soft iron (pure iron ARMCO®, Telar 57 ARMCO®)
- titanium : T35, T40, T50, T60, TA6V,...
- bronze, stellite, aluminium, tantalum, ceramic, fiberglass,...
- plastic : PTFE, PVDF, teflon,...
