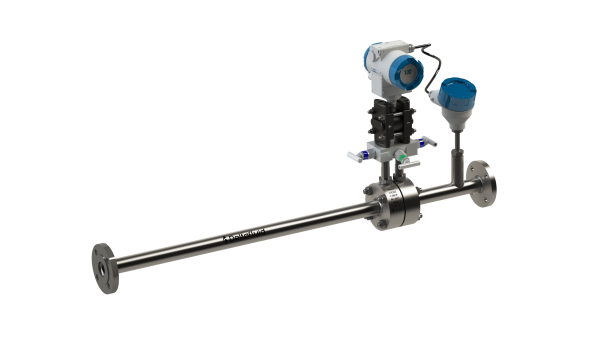
Complete measuring tube for easy on-site installation and precise flow measurement
GENERAL DATA
- Standards: ISO 5167-1 & 2, ASME MFC-3M or ISO / TR 15377.
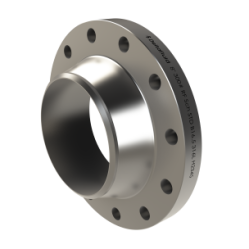
- Mounting of the primary element between flanges: ISO PN 2.5 to PN 420, ASME 150 # to 2500 #, others on consultation.
- Connection : solder (BW) or flanges
- Material: Standard: 304L / 306L stainless steel, others according to your application.
- Fluid: liquid, gas, steam.
- Diameter of pipes: from 25 to 300 mm (for ease of assembly).
- Overall accuracy of measurement ≤ 1% of max flow.
- Repeatability of the measure 0.1%
THE FLOWMETER INCLUDES:
- the desired orifice (orifice plate, nozzle)
- the flanges to fix the orifice
- the pressure taps (at the flange or in the corners, depending on the primary element chosen) and the impulse tubes
- integrated or remote 3 or 5 way manifold
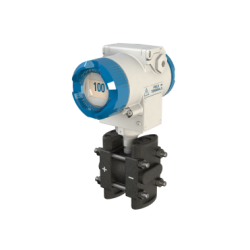
- the preset differential pressure transmitter
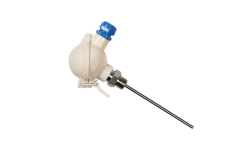
- the built-in temperature sensor (for temperature compensation) in option
MOUNTING AND ASSEMBLY DATA:
- Optimized centering of the measuring element
- Honing of upstream and downstream pipes to meet roughness criteria
- Temperature and pressure compensation for gases to achieve very accurate flow measurement
- Remote mounting of the instrumentation according to the applications
CHARACTERISTICS :
- For orifice plates: see corresponding technical data sheet
- For nozzles: see corresponding technical data sheet
- Straight lengths upstream, downstream, roughness and circularity of the tubes, centering measuring element: see details on the FAQ tab on this page
ACCESSORIES :
- Temperature sensor: Sensor mounted on downstream tube - see corresponding technical data sheet
- Multivariable transmitter: This transmitter allows the correction of the density of the gases according to the temperature and the pressure - see corresponding technical sheet
The high-precision measuring tube is generally used for small pipe diameters. Since it meets all the criteria of the standard for upstream and downstream straight lengths, circularity and roughness criteria, it is able to deliver optimum measurement accuracy.
A customer, a specialist in tableware, has chosen to use it for its process: it is to equip the gas supply lines of the burners and allow the control of heating ovens. To know more...
If you do not find the answer you are looking for, please contact us either by phone at +33 (0)5 59 30 85 20 or via the contact form. We will respond as soon as possible.
A measuring tube or meter run consists of the primary measuring element (orifice plate, nozzle ...) connected to the upstream and downstream tubes in compliance with the criteria of roughness *, centering and circularity ** of the standard. The upstream and downstream lengths supplied with the measuring tube correspond to those for which the roughness criterion is critical for a good measuring accuracy (for example for a sharp-edge orifice plate: upstream length 10D according to the standard).
Thus it is possible to obtain a very accurate flow measurement ≤ 1%.
* the internal roughness value of the tube to be respected is stipulated in the standard and depends on the internal diameter of the pipe D, the β and the ReD of the fluid. The honing of the tube allows us to obtain the desired roughness over the desired length.
** The circularity value of the tube is expressed in the standard as a percentage of the inside diameter of the pipe D. We adjust the bore of the tubes if the circularity desired in the standard is more demanding than that of the pipe supplier.
Measuring tubes are generally recommended for small pipe sizes. Indeed, the upstream and downstream straight lengths to be provided depend on the inner diameter D of the pipe. The greater the diameter D is, the longer the straight lengths are.
Example for an orifice plate: to ensure a good measurement accuracy, the minimum upstream length over which the roughness is critical corresponds to a value of 10D *. For a pipe diameter D of 50 mm, the upstream length to be provided with the measuring tube is therefore at least 50 cm. For a diameter D of 300 mm, the length of the upstream tube to be supplied is at least 3 m. For larger diameters, the measuring tube can reach lengths that are difficult to transport. This is why we generally limit the asssembly of high precision tube to DN300 but, if necessary, we are able to manufacture measuring tubes for larger diameters.
The measuring tube has a great benefit: precision, but also a disadvantage: its size (defined according to the values of the standard). It is therefore essential to find the right compromise. We remain at your disposal to determine the right lengths required for your application and evaluate the possibility of manufacturing a high precision measuring tube.
* This upstream length of 10D corresponds to the minimum length over which the roughness criterion must be respected. However, the upstream and downstream total straight lengths to be respected for a measurement by means of a differential pressure flowmeter are greater than this value. Example, for β = 0.5, according to the ISO5167 standard, upstream straight lengths can reach up to 44D depending on the obstacle upstream of the measurement. Refer to the straight length tables of the standard for more details.
